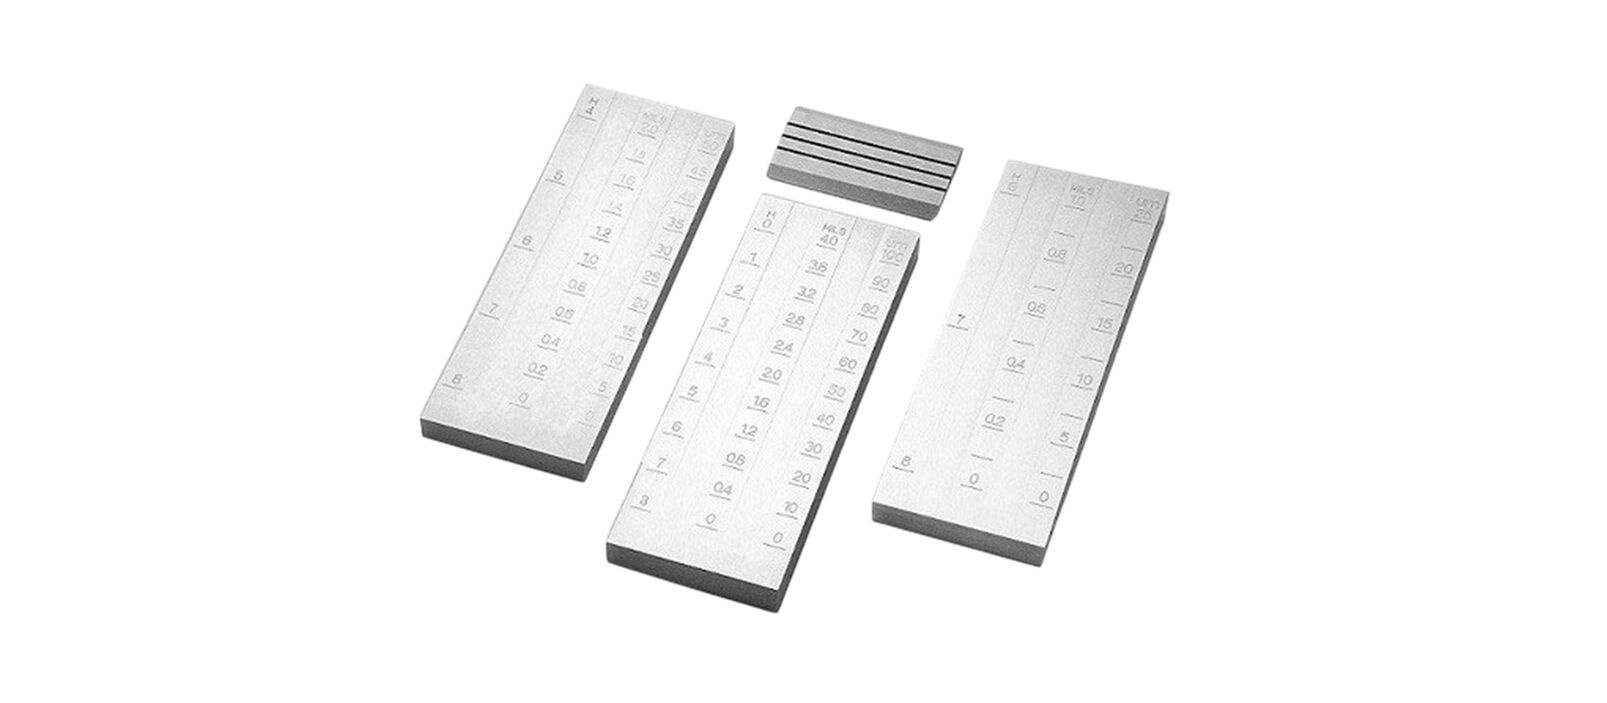
Synonym : Hegman Gauge, Grind Gauge, Particle Size Gauge
Caltech India is the manufacturer and supplier of Fineness of Grind Gauges. The CES 329 Double Channel Fineness of Grind Gauge (commonly known as the Hegman Gauge) is a precision instrument used to measure the particle size or fineness of dispersion in a liquid medium. It is made from hardened stainless steel to ensure durability, and precision over repeated uses. It is also called as Grindometer. Grind Gauges is widely used in industries such as paints, coatings, plastic, printing inks, pigments, cosmetics, paper, chocolates, pharmaceuticals, food, chemical and many other industries to ensure that solid particles are uniformly distributed and adequately ground to achieve optimal product quality.
The CES 329 Grindometer includes a standardized scale, typically in Hegman Units, Mils And Microns. In operation the samples are placed into the top end of the grind gauge and then drawn down using the scraper blade.
Many types of solid materials must be ground or milled into finer particles for dispersion in appropriate liquid vehicles. The physical properties of the resulting dispersions, often called “grinds”, depend not only on the actual size of the individual particles, but also on the degree to which they are dispersed. The Fineness Gauges are used to indicate the fineness of grind or the presence of coarse particles or agglomerates in a dispersion. It does not determine particle size or particle size distribution.
The degree of dispersion is indicated in Microns (µm) or Hegman (H), The Hegman scale ranges from 0 to 8 with numbers increasing as the particle size decreases.
0 Hegman = 100 microns particle size
4 Hegman = 50 microns particle size
8 Hegman = 0 microns particle size
The Fineness of Grind Gauge (Hegman Gauge) and its scraper are made of hardened stainless steel and have one or two grooves with a graded slope (dependent on the model chosen), graduated in microns, mils, NS (Hegman).
Procedure: Place a slight excess of sample in the deep end of the groove, and with the straight-edge scraper provided, draw the sample toward the shallow end of the groove. Rating GU are in term of the point on the scale where the oversize particles, or furrows made by them, first appear in substantial concentration.
Standards: ASTM D1210, ASTM D1316, ASTM D333, ISO 1524, BS3900-C6, DIN 53203, JIS K 5600-2-5
Ordering Information:
CES 329 – Fineness of Grind Gauges (Hegman Gauge)
| Description | Order Information | Ranges | Number of Grooves | Groove Size (L×W) | Graduation | Unit | |
|---|---|---|---|---|---|---|---|
| CES 329/0 | 0-15µm | 2 | 140×12mm | 1.5 µm | μm / Mils / Hegman | ||
| Grind Gauge | CES 329/1 | 0-25µm | 2 | 140×12mm | 2.5 µm | μm / Mils / Hegman | |
| (Double Channel) | CES 329/2 | 0-50µm | 2 | 140×12mm | 5 µm | μm / Mils / Hegman | |
| CES 329/3 | 0-100µm | 2 | 140×12mm | 10 µm | μm / Mils / Hegman |
In India, we have various customers from Mumbai, Delhi, Bangalore, Chennai, Hyderabad, Ahmedabad, Kolkata, Surat, Pune, Jaipur, Lucknow, Kanpur, Nagpur, Visakhapatnam, Indore, Bhopal, Patna, Vadodara, Ghaziabad, Ludhiana, Coimbatore, Madurai, Nashik, Srinagar, Aurangabad, Dhanbad, Allahabad and Ranchi in India.
We also export our range of products to worldwide countries like USA, Canada, Chile, United Kingdom – UK, Spain, Germany, Italy, Dubai, Abu Dhabi, U.A.E, Oman, Saudi Arabia, Singapore, Kuwait, Iran, Indonesia, Thailand, and many more as well.
