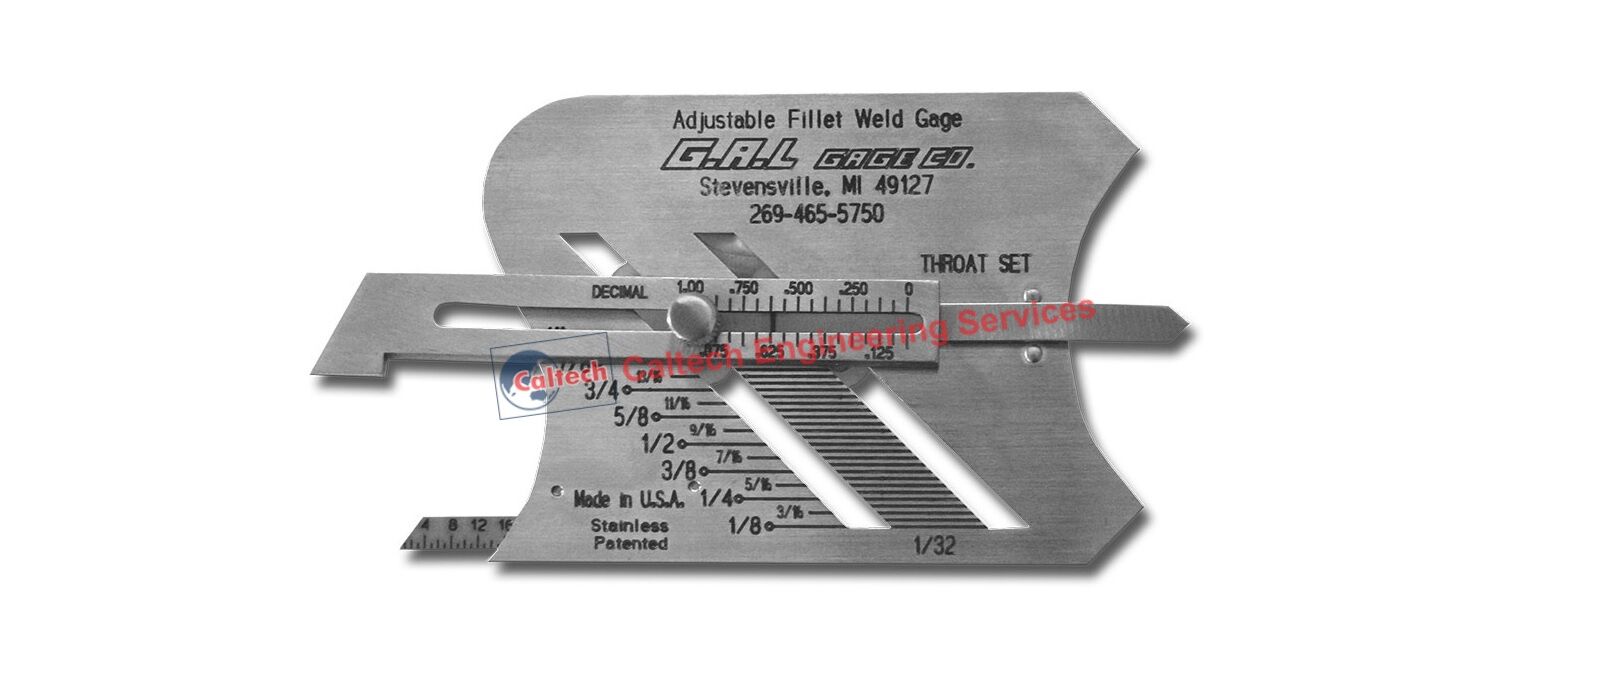
Caltech India offers Adjustable Fillet Weld Gauge. It measures both leg lengths and weld throat fillet weld thickness. The GAL Gage Adjustable Fillet Weld Gauge is made of durable, rust resistant stainless steel. Its 2¼ x 3″ slim design weighs only 1½ oz., fits easily into a shirt pocket. And because there is just one gauge needed to make all measurements, the chance of losing essential fillet weld gauge blades is eliminated. Fumbling through seven different, inaccurate gauge blades is also eliminated.
WITH UNEQUAL LEG MEASUREMENT FEATURE
Measure any fillet weld to 1/32″ accuracy with just one simple to use gauge.
Measuring fillet welds used to be a trial with complicated or inaccurate gauges. Not any more. Now you can measure fillet welds from 1/8″ to 1″ (with ±1/32″ accuracy) with one economical, simple to understand gauge.
The G.A.L. Adjustable Fillet Weld Gauge uses an offset arm which slides at a 45° angle to make fillet weld length measurements. Simply adjust the arm until it touches the toe of the vertical leg. The gauge is calibrated to 32nds, with metric equivalents given, so you get more accurate readings. Four screws hold the offset arm in position for future adjustments.
This welding inspection gauge also measures weld throat thickness to 1/ 16″ by adjusting a pointer until it touches the centre of the weld. A thumb screw holds the pointer in position for future reference. If the weld is concave, more filler material can be added to build the weld throat up to standard.
Ordering Information:
| GAL-3 | Adjustable Fillet Weld Gauge |
| GAL-3M | Metric Adjustable Fillet Weld Gauge |
Adjustable Fillet Weld Gauge is easy to use
To measure fillet welds, place irregular curve edge flush to horizontal toe of weld so the straight edge is in line with the horizontal member.
Adjust the offset arm up or down along the diagonal slots until the tip of the arm touches the top of the weld.
Read the weld size indicated. The increments are in 1/32″ and 1/8″ markings up to 1″. All numerals are etched into the surface and filled for easier reading.
To measure weld throat thickness, place the 45° angle flush to the horizontal and vertical members. Loosen the thumb screw and slide the pointer until it touches the face of the weld.
Tighten the thumb screw and read the measurement from the 1/16″ calibrations along the pointer. A quick, sure way to find convex or concave welds and to correct them with additional filler material to meet standards.
NEW! Measure unequal weld leg lengths by sliding the base measurement scale so it is flush to the horizontal toe of the weld. Adjust offset arm to touch top of weld. Add or subtract to obtain length of each leg.
In India, we have various customers from Mumbai, Delhi, Bangalore, Chennai, Hyderabad, Ahmedabad, Kolkata, Surat, Pune, Jaipur, Lucknow, Kanpur, Nagpur, Visakhapatnam, Indore, Bhopal, Patna, Vadodara, Ghaziabad, Ludhiana, Coimbatore, Madurai, Nashik, Srinagar, Aurangabad, Dhanbad, Allahabad and Ranchi in India.
